A few weeks back I wandered over to John’s for one last game in his beautiful new house… before he moved out of it!
We set up a game of Wargaming Nineteenth Century Europe 1815-1878 and, as per
custom, I took the Austrians and John took Russians.
(I had secretly hopped he might
bust out the Russo-Japanese war stuff – as our first game had been with those
figures – but I’m not complaining, any game at John’s house is guaranteed to be
a good time).
SCENARIO
We played the standard “Pitched
Battle” scenario and, for once, actually ended up being able to set up on the
long sides of the table.
To win one had to be in possession of three of the four victory locations at the end of the fifteenth turn.
To win one had to be in possession of three of the four victory locations at the end of the fifteenth turn.
In the “Pre-Battle Events” I
rolled “Bogged Down” and lost two units. John rolled “Traffic Congestion” and
three of his units would not arrived unit turn five.
FORCES
Austrians
6x Infantry
1x Skirmishers
1x Cavalry
2x Artillery
(One artillery and one infantry
was lost due to pre-game events)
Russians
5x Infantry
1x Cavalry
4x Artillery
1x Cossacks
(I think an artillery, an
infantry, and a cavalry unit were delayed)
THE GAME
(Remember: click on the pictures
for a bigger version)

Initial set up from the
Southeast – my Austrians are deployed on the south edge of the table.

Initial set up from the
Southwest.

Again with the initial set up –
from the Northwest.

The Austrians begin their
advance.

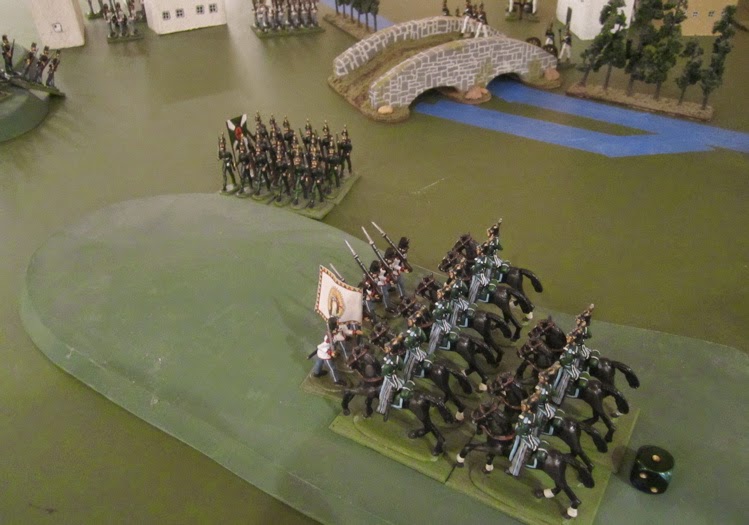
On the second to third turn the
Austrian cavalry clashed with Russian infantry…

… nearly pushing them right off
the table with the first clash! I tried to take the battle to the Russians as I
know I would only have slight numerical superiority for the first five turns…

So fast was my advance that my
infantry overran Russian guns before they could even get set up on the hill!
Huzzah!

The remnants of my cavalry
fleeing from their second clash with the Russian Infantry west of town.

In the foreground I have three
Infantry units converging on the town – one of the victory locations (of which
there were four..? Two hills and two villages?). Another Infantry unit is
eyeing up one of John’s units across the bridge spanning the river wondering
how they’re supposed to cross that thing according to the rules. In the
distance I have a unit of cavalry and a unit of artillery facing some Russian
Cossacks. Oh, and my Skirmishers are on the wooded hill sniping at some of John’s
infantry on the outskirts of the village on the other side of the river.

Russian Cossacks charge and
overrun my guns.

The Russians finally decide the
best way to go about crossing the bridge is in column of march!

This leads to their near
annihilation at the hands of my deployed infantry.

Austrian infantry sweep down off
the hill and smash through the wavering Russian line.
Then I got kind of lazy with the
picture taking… all these were taken BEFORE the fifth turn when The Russians
reinforcements show up… the next pictures are many turns later…?
That full strength Austrian unit
that was holding the bridge…? Yeah, that’s them not backed up to the hill
(another victory location) being charged by Russian Reserve Cavalry That cam
one on the fifth turn and galloped all the way around the flanks to try and
take that hill in my rear. The Russian Infantry that’s just crossed the bridge
is one that also came on from reserve. The Russian gun set up just on the far
side of the bridge is also one that came out of reserve on the fifth turn.

John and his fabulous game table
full of toy soldiers (with bubblewrap for the immanent packing in the background!)

The remains of the unit of
Russian Cossacks (after charging down the gun) They kind of held the extreme
left of the Russian line and mostly just hung out to make sure my skirmishing
Grenz didn’t try to pull anything funny as some of his other troops pulled out
of their positions opposite to go and try to reinforce their wavering right.
The Russians are always supposed
to get 1-2 free units of Cossacks – this is the first game we actually got to
play with them (as John hadn’t has any for our previous games)!

The end of the game.
I think technically the Austrians
won. They held a village and the wooded hill. The Russian held the other
village but this hill was still somewhat contested at the end of the fifteenth
turn. I didn’t take note of the losses at the end of the game – but it was a
pretty bloody battle and I don’t think the Austrians would have been able to
hold onto their victory locations for long had it continued...
Good times. I’m going to miss
these games. Hopefully I’ll get John over here for a game or two before he
takes off for good.
Coming soon on Tim’s Miniature Wargaming Blog:
I did get a bit of painting done over the weekend. Mostly
Medieval subjects… but there’s some more Great War stuff on the workbench…
This week I hope to get in a game of Galleys and Galleons –
so stay tuned for that report!


Hey Tim, any idea how this ruleset would work for the War of 1812? The games I've seen you guys play of it looks like it would be a nice fit for my 54mm figs.
ReplyDeleteWith some tweaking, I don't see why it couldn't...? We had to do a little tweaking ourselves - the game is written for units of four stands (John's units all have six). It also seems to be written with teeny-tiny figures in mind - all the measurements are in centimetres and the playing area is 90cmx120cm - as John's toys are 40mm and those distances would be ridiculously small, we used inches and a 4'x8' table.
ReplyDeleteNeil Thomas also has a Napoleonic set of rules (I think it's just called Napoleonic Wargaming) which may be more appropriate...? I haven't played it so I can't really say how different it'd be - from a brief perusal of the rules the only difference I recall was that you could form square (there are no rules for doing so in Wargaming Nineteenth Century Europe). All his rule sets are frightfully similar and what I'd call a nice mixture of old school and more modern gaming mechanics.
Hope that helps..?
Very nice report. I love John´s soldiers and is always a pleasure for me to see them "at work".
ReplyDeleteI see that in all the meleés units are aligned in full face contact. Do you use some sort of "conforming" rule?
Thanks.
DeleteI guess we sort of conform them one they make contact. WE play a little fast and loose - if the centre front of a unit can make it into contact, it's moved into contact and we generally line them up even like.
I think, according to the rules, only one unit can contact any one side of a unit - which forced me to do a lot of fiddling around when I wanted to attack the town that was boing held by a Russian battalion. The unit holding the town is assumed to be spread out around the town - so each side of the town counts as a face of the unit - even though the town was big enough that two full units could have come into contact with one edge of the town I had to maneuver the two flanking battalions around the two sides of the town to coordinate a three-on-one attack on the town.
Many thanks for your answer.
DeleteThat's a very, very cool looking table :)
ReplyDeleteit is! It's always been great fun playing games at John's house...
DeleteThat's a very, very cool looking table indeed :)
ReplyDelete